Creating Content in a Dark Hotel Room? How AI Saved My Filming Day
The Real Struggle of Hotel Room Lighting

If you’ve ever tried to film content in a hotel room, you know the struggle is real. I’m often on the road, creating social media content for clients and my own channels, and I’ve lost count of how many times I’ve been faced with dim, uninspiring hotel lighting. Even with all the room lights on and the sun just starting to peek through the window, the results are usually less than ideal. As a content creator and marketing strategist, I know that good lighting isn’t just a “nice to have”—it’s essential for audience engagement and professional results.

But here’s the thing: you don’t have to be a lighting expert to get great results. In this post, I’ll walk you through how I used the AI assistant Gen Spark to set up my Aputure MC Pro light and transform a dark hotel room into a proper filming setup in just minutes. Whether you’re a business owner, a content creator, or just someone who wants to look their best on camera, this guide is for you.
Why Lighting Matters for Creators
Let’s be honest: people are drawn to well-lit videos. Interesting, flattering lighting not only makes your content look more professional, but it also keeps viewers watching longer. In the world of social media and digital marketing, your lighting can make or break your first impression.

I’ve invested in some great gear over the years—gimbals, lenses, and, of course, my trusty Aputure MC Pro light. But even with the right tools, knowing how to use them effectively is another story. That’s where AI comes in.
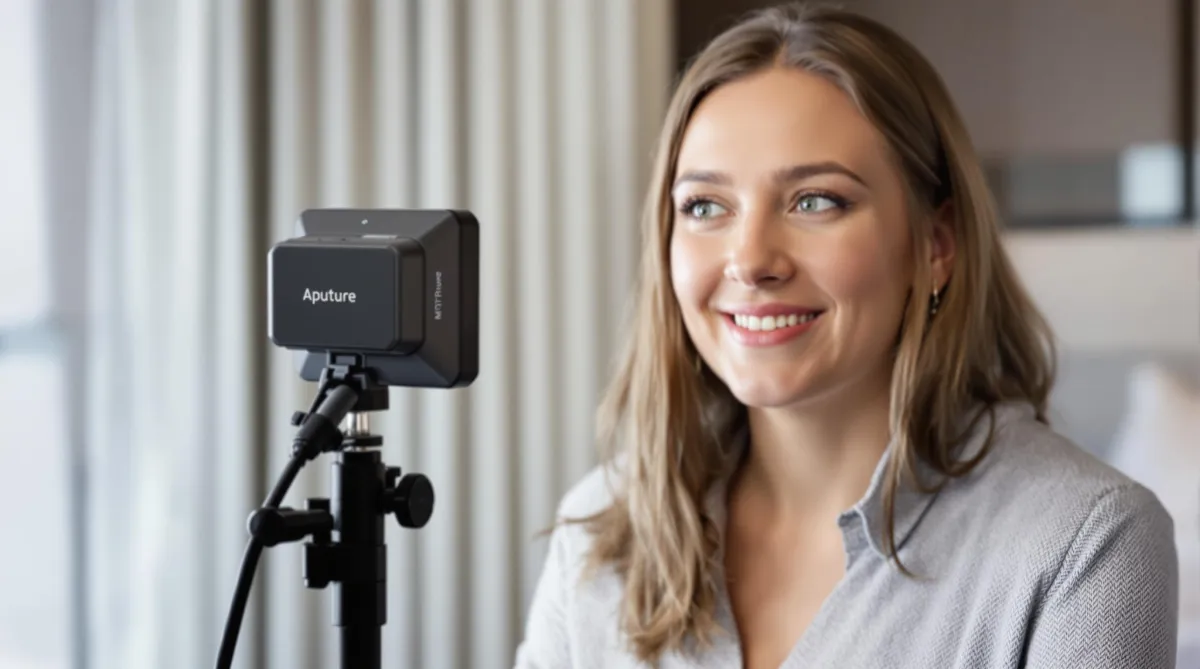
My Gear: Keeping It Simple
For this setup, I used:
Aputure MC Pro Light: Compact, powerful, and versatile.
Gimbals and Lenses: For stabilization and different looks (though lighting is the real star here).
Gen Spark AI Assistant: My secret weapon for step-by-step lighting guidance.
I’ll be the first to admit: I’m not a lighting guru. But with everything online these days, I knew there had to be a smarter way to get the results I wanted—without spending hours fiddling with settings.

How Gen Spark AI Guided My Lighting Setup
Step 1: Getting AI Help
I opened up Gen Spark and told it exactly what I was dealing with: “I’m filming in a dark hotel room and want to add extra light. I need help with the best lighting settings. I have the Aputure MC Pro light.”

I also asked it to explain things “like I’m a fifth grader.” Sometimes, the best way to learn is to keep it simple!
Step 2: Powering On and Adjusting Brightness
Gen Spark’s first instruction was straightforward: turn on the light by pressing and holding the button for one second. Once it was on, I looked at the screen on top and used the red dial to adjust the brightness. Easy.
Step 3: Positioning the Light
The AI recommended placing the light 2–3 feet away from my face, either to the side or slightly above. This positioning helps create natural, flattering shadows and avoids that dreaded “deer in headlights” look.
Step 4: Setting the Color Temperature (CCT)
For natural skin tones, Gen Spark suggested setting the color temperature (CCT) to 4300K. This is a sweet spot for most indoor environments, balancing warmth and clarity.
Step 5: Adding a Dome Diffuser
To soften the light and make it more flattering, I attached the dome diffuser. The AI reminded me to point the light at my face from the side or just above—my go-to for a professional look.
Step 6: Fine-Tuning with Green/Magenta Shift
One of the most helpful tips was adjusting the Green/Magenta (GM) shift. Hotel lighting can sometimes make you look a little sickly or green. Gen Spark recommended setting the GM shift to -2 or -3, which instantly improved my skin tone on camera.
Step 7: Setting Light Intensity
Finally, the AI suggested setting the light intensity to 65%. This was bright enough to illuminate my face without washing me out.
📺 See the complete setup process in my detailed video tutorial:**
Watch the Full Lighting Setup Process
Testing Angles and Final Adjustments
With the basics set, I experimented with different angles and positions. Sometimes, just moving the light a few inches can make a big difference. I checked how the lighting looked from the left, right, and above, and settled on the setup that felt most flattering.
The best part? I didn’t have to guess or stress about any of it. Gen Spark walked me through each step, making the process quick and painless.
Reflections: You Don’t Need to Be a Lighting Expert
Here’s my biggest takeaway: you don’t have to be a pro to get pro results. With AI tools like Gen Spark, anyone can achieve high-quality video lighting—no technical expertise required. I was able to go from a poorly lit hotel room to a setup that was “good enough to go live” in just a few minutes.

If you’re a creator, business owner, or just someone who wants to look their best on camera, don’t let lighting hold you back. Try out AI-powered tools and see how much easier (and more fun) content creation can be.
Conclusion: Let AI Light the Way
Filming in a dark hotel room used to be a nightmare, but with the right tools and a little help from AI, it’s now one of the easiest parts of my workflow. If you’re ready to elevate your content and take the guesswork out of lighting, give Gen Spark (or a similar AI assistant) a try. You might be surprised at how much it empowers you to create, connect, and shine—wherever you are.
Ready to transform your content creation process?
📸 See more behind-the-scenes content and quick lighting tips on my Instagram:
Check out this hotel lighting transformation on Instagram
Subscribe to my channel for more hands-on AI tutorials, or reach out if you want to learn how Lens on Luxury can help your brand stand out in any light.
